
การเดินทางของช่างฝีมือ: คู่มือที่ครอบคลุมเกี่ยวกับการสั่งทำสร้อยคอเงินสเตอร์ลิงตามสั่ง
การสร้างสร้อยคอเงินสเตอร์ลิงสั่งทำพิเศษถือเป็นการเล่นแร่แปรธาตุทางศิลปะที่น่าหลงใหล, ศาสตร์, และประเพณี. ต่างจากเครื่องประดับที่ผลิตจำนวนมากในร้านค้าในเครือ, ผลงานสั่งทำพิเศษเกิดขึ้นจากการเดินทางร่วมกัน โดยเปลี่ยนแนวคิดที่เป็นนามธรรม, ภาพร่างที่หายวับไป, หรือความรู้สึกอันหวงแหนให้กลายเป็นสิ่งที่จับต้องได้, วัตถุขัดเงาแห่งความงามอันยั่งยืน . คู่มือนี้จะแยกโครงสร้างกระบวนการทั้งหมดอย่างพิถีพิถัน, ตั้งแต่จุดเริ่มต้นแห่งแรงบันดาลใจไปจนถึงความแวววาวสุดท้ายของชิ้นงานที่เสร็จสมบูรณ์.
ขั้นตอน 1: ปฐมกาล—การดลใจและแนวความคิด
งานสั่งทำพิเศษทุกชิ้นเริ่มต้นก่อนที่โลหะจะหลอมละลาย. การเดินทางเริ่มต้นด้วยความคิด. นี่อาจเป็นภาพร่างคร่าวๆ บนผ้าเช็ดปาก, รูปถ่ายของมรดกตกทอดโบราณ, หรือเพียงแค่ความปรารถนาที่จะเป็นเจ้าของเครื่องประดับที่บอกเล่าเรื่องราวส่วนตัว . ขั้นตอนแรกคือการทำให้วิสัยทัศน์นี้แข็งแกร่งขึ้น.
การให้คำปรึกษาลูกค้าและบทสรุปการออกแบบ:
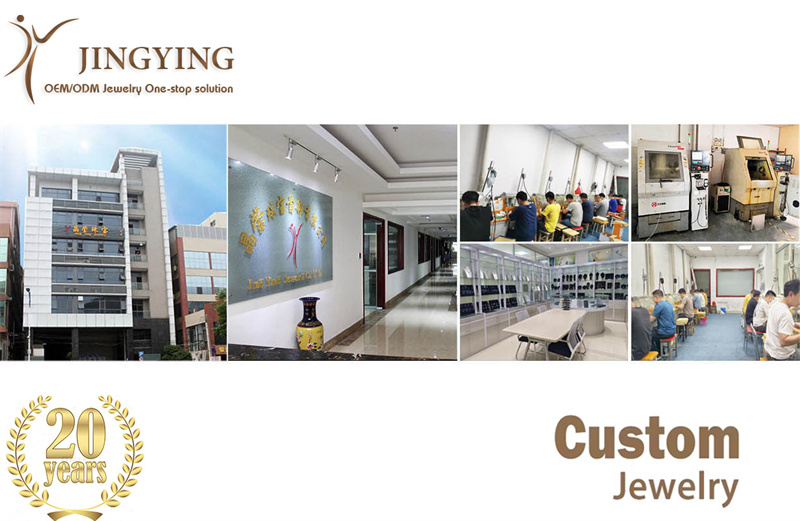
กระบวนการนี้เริ่มต้นอย่างเป็นทางการเมื่อลูกค้าเชื่อมต่อกับนักออกแบบหรือผู้ผลิตเครื่องประดับ. สำหรับช่างฝีมืออิสระหรือสตูดิโอเหมือนที่พบในแพลตฟอร์มอย่าง Pinkoi, สิ่งนี้เกี่ยวข้องกับการสื่อสารโดยตรงเพื่อหารือเกี่ยวกับการออกแบบเฉพาะ, ข้อความ, หรือสัญลักษณ์เพื่อใช้และยืนยันราคา . สำหรับผู้ผลิต OEM รายใหญ่เช่น Fulcol หรือ JINGYING, นี่เป็นทางการมากขึ้น "การให้คำปรึกษาลูกค้า" เฟส. ผู้จัดการโครงการทำงานร่วมกับลูกค้าเพื่อทำความเข้าใจวิสัยทัศน์ที่แน่นอน: การออกแบบมีความสมจริงหรือเรียบง่าย? จะมีขนาดและน้ำหนักประมาณเท่าใด? รายละเอียดทางเทคนิค เช่น ความหนาของผนัง, บูรณาการอัญมณี, และมีการหารือเรื่องงบประมาณด้วย . ขั้นตอนนี้มีความสำคัญอย่างยิ่งต่อการสร้างความเป็นไปได้และต้นทุนของโครงการ.
ข้อควรพิจารณาที่สำคัญสำหรับระยะนี้:
-
สไตล์สุนทรียศาสตร์: เรียบง่าย, วินเทจ, ทันสมัย, อินทรีย์?
-
ความสามารถในการสวมใส่: สร้อยจะแนบไปกับลำตัวอย่างไร?
-
งบประมาณ: เงินเป็นโลหะมีค่าที่ราคาไม่แพง, แต่ราคาจะแตกต่างกันไปขึ้นอยู่กับความซับซ้อนและหิน.
-
ลักษณะเฉพาะของการออกแบบ: มันเป็นป้ายชื่อ, สัญลักษณ์, หรือรูปแบบที่ซับซ้อน?
ขั้นตอน 2: พิมพ์เขียว—การออกแบบและเอกสารประกอบ
เมื่อแนวคิดชัดเจนแล้ว, ความคิดที่คลุมเครือนั้นมีรูปแบบที่เป็นรูปธรรม. สิ่งนี้เกี่ยวข้องกับการร่างภาพ, การตัดสินใจด้านวัสดุ, และจัดทำแผนทางเทคนิค.
การร่างเบื้องต้นและการเขียนแบบทางเทคนิค:
นักออกแบบจะย้ายจากภาพร่างด้วยมือเปล่าไปเป็นภาพวาดทางเทคนิคที่เป็นทางการมากขึ้น. นี่คือ "พิมพ์เขียว" ที่กำหนดทุกแง่มุมของชิ้นงาน: ขนาดที่แน่นอน, ความหนาของโลหะ, และรูปแบบของตัวล็อคและตัวล็อค . สำหรับงานคัสตอมร่วมสมัยที่สุด, เกือบทั้งหมดทำได้โดยใช้การออกแบบโดยใช้คอมพิวเตอร์ช่วย (คิว) ซอฟต์แวร์เช่น Rhino 3D, เมทริกซ์โกลด์, หรือ ZBrush .
บทบาทของ CAD (การออกแบบโดยใช้คอมพิวเตอร์ช่วย):
CAD ถือเป็นขั้นตอนทางเทคโนโลยีที่สำคัญที่สุดในการทำเครื่องประดับตามสั่งสมัยใหม่. นักออกแบบสร้างโมเดลดิจิทัล 3 มิติที่แม่นยำของสร้อยคอ . สิ่งนี้ให้ประโยชน์มากมายมากมาย:
-
ความแม่นยำ: ทุกมิติมีความแม่นยำ, ทำให้ส่วนประกอบต่างๆ เข้ากันได้อย่างลงตัว.
-
การแสดงภาพ: ซอฟต์แวร์สร้างการเรนเดอร์เสมือนจริง, ช่วยให้ลูกค้าสามารถ "ดู" ชิ้นส่วนจากทุกมุมก่อนที่จะใช้โลหะหนึ่งออนซ์ .
-
การปรับเปลี่ยน: การเปลี่ยนแปลงในไฟล์ดิจิทัลทำได้ง่ายกว่าอย่างไม่มีสิ้นสุดในแบบจำลองทางกายภาพ.
-
วิศวกรรม: ผู้ออกแบบสามารถมั่นใจได้ว่าโมเดลจะเป็น "ผลิตได้," เพิ่มป่วง (ช่องทางการไหลของโลหะ) และมั่นใจได้ถึงความหนาของผนังที่เหมาะสม .
-
การคำนวณน้ำหนัก: ซอฟต์แวร์จะคำนวณน้ำหนักที่แน่นอนของเงินที่ต้องการ, ซึ่งเป็นสิ่งสำคัญสำหรับการคิดต้นทุน .
ขั้นตอน 3: มูลนิธิ—การสร้างแบบจำลองและการสร้างต้นแบบ
เราจะเชื่อมช่องว่างระหว่างไฟล์ดิจิทัลกับวัตถุสีเงินได้อย่างไร? สิ่งนี้สามารถทำได้โดยการสร้างต้นแบบ.
การสร้างแบบจำลองทางกายภาพ:
ไฟล์ CAD ที่ได้รับอนุมัติจะใช้เพื่อสร้างแบบจำลองทางกายภาพของจี้. โดยปกติจะทำผ่านการพิมพ์ 3 มิติที่มีความละเอียดสูง (SLA หรือ DLP), ซึ่งใช้เรซินเหลวที่ไวต่อรังสียูวีเพื่อสร้างชั้นแบบจำลองด้วยชั้นขนาดเล็กมาก . พลาสติกแข็งแบบนี้ (หรือแว๊กซ์หล่อพิเศษ) โมเดลจับทุกรายละเอียดที่ซับซ้อน. ในการตั้งค่าแบบดั้งเดิมมากขึ้น, ช่างฝีมือผู้ชำนาญอาจแกะสลักแบบจำลองโดยตรงจากก้อนขี้ผึ้งของช่างอัญมณี, แม้ว่าการพิมพ์ 3 มิติจะเป็นมาตรฐานสมัยใหม่ในด้านความแม่นยำและความเร็ว . ช่างฝีมือนำเสนอต้นแบบทางกายภาพนี้แก่ลูกค้าเพื่อขออนุมัติขั้นสุดท้าย . เมื่อต้นแบบนี้ได้รับการอนุมัติแล้ว, การออกแบบถือว่าเสร็จสิ้นแล้ว, และการแก้ไขมักจะเป็นไปไม่ได้หรือมีค่าใช้จ่ายสูงมาก .
ขั้นตอน 4: การเปลี่ยนแปลง—การหล่อเงิน
นี่คือขั้นตอนการแปลงหุ่นจำลองให้เป็นเงินสเตอร์ลิงผ่านกระบวนการอันเก่าแก่และแม่นยำ การคัดเลือกนักแสดงที่หายไป (หรือที่เรียกว่าการหล่อการลงทุน) . เทคนิคนี้ใช้กันมานับพันปีแต่ปัจจุบันได้รับการขัดเกลาอย่างสูง .
ขั้นตอน 1: สปริงและการลงทุน
-
โมเดลเรซิน/แว็กซ์ติดอยู่กับแกนแว็กซ์ตรงกลางโดยมีช่องแว็กซ์ที่เรียกว่า "ป่วง," การขึ้นรูป "ต้นไม้ขี้ผึ้ง" ต้นไม้ชนิดนี้สามารถหล่อได้หลายชิ้นในคราวเดียว หรือทำให้โลหะไหลได้อย่างเหมาะสมสำหรับชิ้นใหญ่ชิ้นเดียว .
-
ต้นไม้ถูกวางไว้ในกระบอกเหล็ก (กระติกน้ำ), และสารคล้ายปูนปลาสเตอร์เหลวที่เรียกว่า "การลงทุน" ถูกเทลงไปรอบๆ. โดยผสมกันภายใต้สุญญากาศเพื่อขจัดฟองอากาศที่อาจทำให้เกิดข้อบกพร่อง .
ขั้นตอน 2: ความเหนื่อยหน่าย
-
ขวดที่ชุบแข็งแล้วจะถูกวางในเตาเผาและให้ความร้อนที่อุณหภูมิสูง (ประมาณ 700°C/1300°F). กระบวนการนี้อบการลงทุนให้กลายเป็นเปลือกแข็ง และละลายและทำให้แว็กซ์/เรซินกลายเป็นไออย่างสมบูรณ์, ทิ้งความสมบูรณ์แบบไว้เบื้องหลัง, ช่องลบกลวงในรูปของจี้ .
ขั้นตอน 3: การหล่อ
-
925 เม็ดเงินสเตอร์ลิง (92.5% เงินบริสุทธิ์ผสมด้วย 7.5% ทองแดงเพื่อความทนทาน) ถูกละลายในเบ้าหลอมที่อุณหภูมิประมาณ 960°C .
-
นำกระติกน้ำร้อนออกจากเตา, และเงินหลอมก็ถูกดันเข้าไปในโพรง. ทำได้โดยใช้อย่างใดอย่างหนึ่ง แรงเหวี่ยง (หมุนแม่พิมพ์) หรือ หล่อสูญญากาศ (โดยใช้แรงดันลบดูดโลหะเข้าไป), มั่นใจได้ว่าเงินจะเติมเต็มทุกรายละเอียด .
ขั้นตอน 4: การระบายความร้อนและการทำลายล้าง
-
ขวดถูกทำให้เย็นลง, แล้วกระโจนลงน้ำ. ปูนปลาสเตอร์การลงทุนที่เปราะบางก็แตกสลาย, เผยให้เห็น "ต้นเงิน" ด้วยการหล่อจี้แบบหยาบ . จากนั้นแต่ละชิ้นจะถูกตัดออกจากต้นไม้ด้วยเลื่อยของช่างอัญมณี .
ขั้นตอน 5: วิวรณ์—การตกแต่งและการประกอบ
นี่เป็นระยะที่ใช้แรงงานเข้มข้นที่สุด, ดิบที่ไหน, การหล่อแบบหยาบกลายเป็นเครื่องประดับขัดเงา. นี่คือจุดที่ทักษะของช่างอัญมณีเปล่งประกายอย่างแท้จริง.
การฉีกขาดล่วงหน้า (จาระบี):
การหล่อแบบดิบมีเนื้อด้าน, เนื้อหยาบเล็กน้อยและสิ่งที่แนบมาป่วง. ช่างฝีมือใช้ชุดเครื่องมือต่างๆ ในการปรับแต่ง:
-
เลื่อย & การยื่น: Sprues ถูกตัดออก, และตะไบขอบหยาบออกไป .
-
การขัด: ชิ้นงานจะถูกขัดด้วยกระดาษทรายที่มีความละเอียดมากขึ้นเรื่อยๆ เพื่อให้พื้นผิวเรียบ .
-
ไม้ลอย: ชิ้นงานถูกนำไปใส่ในเครื่องจักรที่มีลูกยิงเหล็กและสารขัดเงา. นี้ "ทำงานหนักขึ้น" โลหะและสร้างความเงางามเบื้องต้น .
การตั้งค่าหิน (ถ้ามี):
หากการออกแบบมีอัญมณี, ช่างอัญมณีเฉพาะทาง (ผู้ตั้งค่า) ตอนนี้ก้าวเข้ามา. การใช้เครื่องมือที่มีความแม่นยำและกล้องจุลทรรศน์, พวกเขาตัดที่นั่งเป็นโลหะและยึดก้อนหินไว้. การตั้งค่าทั่วไปสำหรับสร้อยคอได้แก่ การตั้งค่าง่าม (กรงเล็บโลหะที่ถือหิน), การตั้งค่ากรอบ (ขอบโลหะพับทับหิน), หรือ การตั้งค่าแพด (หินเล็กๆ จำนวนมากวางเรียงชิดกัน) .
การขัดและพื้นผิว:
ขั้นตอนนี้จะกำหนดรูปลักษณ์สุดท้ายของสีเงิน .
-
ขัดสูง: ชิ้นงานได้รับการขัดเงาบนล้อแบบมอเตอร์ด้วยผ้ามัสลินและคอมพาวด์อย่างตริโปลี (เพื่อลบรอยขีดข่วน) และสีแดง (เพื่อให้ได้มาซึ่งยอดเยี่ยม, ความเงางามเหมือนกระจก) .
-
ซาติน/เคลือบด้าน: สร้างโดยการปัดด้วยแปรงลวดหรือการพ่นทราย.
-
ออกซิเดชัน (ของโบราณ): สารละลายเคมีเช่น "ตับของกำมะถัน" ทำให้สีเงินเข้มขึ้น, ทำให้ส่วนเว้ามืดลงเพื่อสร้างคอนทราสต์ที่น่าทึ่ง. จุดสูงจะถูกขัดกลับเป็นสีเงินสว่าง, โดยเน้นรายละเอียด .
การประกอบ:
จี้ที่ทำเสร็จแล้วติดอยู่กับโซ่ (มักเลือกจากแค็ตตาล็อกสไตล์ต่างๆ เช่น สายเคเบิล, กล่อง, หรือฟิกาโร) ผ่านห่วงกระโดดและการประกันตัว. มีตัวล็อคติดอยู่, และการเชื่อมต่อทั้งหมดได้รับการตรวจสอบเพื่อความปลอดภัย .
ขั้นตอน 6: ตอนจบ—การควบคุมคุณภาพและการนำเสนอ
การเดินทางจบลงด้วยการตรวจสอบอย่างเข้มงวดและการนำเสนอที่สนุกสนาน.
การควบคุมคุณภาพ:
ช่างอัญมณีจะทำการตรวจสอบขั้นสุดท้ายอย่างพิถีพิถันโดยใช้กำลังขยาย:
-
ความสมบูรณ์ของโครงสร้าง: บัดกรีทั้งหมดสะอาดและแข็งแรง?
-
ความปลอดภัยของหิน: หินทุกก้อนถูกตั้งไว้อย่างมั่นคง?
-
เสร็จ: การขัดเงาสม่ำเสมอและไร้ที่ติ?
-
การทำงาน: ตัวล็อคเปิดและปิดได้อย่างราบรื่น?
-
ความบริสุทธิ์: จุดเด่นของ "925" มักจะถูกประทับตรา, รับรองคุณภาพเงินสเตอร์ลิง .
การทำความสะอาดและการจัดส่ง:
วางสร้อยคอไว้ในเครื่องทำความสะอาดอัลตราโซนิกเพื่อขจัดคราบสารขัดเงาและรอยนิ้วมือทั้งหมด, then steamed dry for a final, brilliant luster . It is carefully placed in a presentation box, often with anti-tarnish materials, and delivered to its owner.
บทสรุป: The Journey from Concept to Heirloom
Custom-making a sterling silver necklace is a journey of over 50 ขั้นตอนที่แม่นยำ, taking anywhere from 3 ถึง 6 weeks depending on complexity and the manufacturer's workflow . It represents a perfect marriage of traditional craftsmanship and modern technology, transforming a simple idea into a wearable masterpiece. From the initial CAD rendering to the final polish, every piece is a testament to the skill of the artisan and the enduring beauty of sterling silver. Whether you are a designer looking to launch a brand or an individual seeking a one-of-a-kind piece, understanding this process illuminates the value and artistry inherent in custom jewelry.