The Art of Adornment: A Complete Guide to the Sterling Silver Earring Manufacturing Process
Earrings are among the most intimate and expressive forms of jewelry. They frame the face, reflect personal style, and often hold deep sentimental value. When crafted from sterling silver, they combine the luminous beauty of a precious metal with durability and affordability. The journey from a raw idea to a finished pair of sparkling silver earrings is a fascinating blend of artistry, precision engineering, and meticulous handcrafting.
This article provides a exhaustive, step-by-step exploration of the entire process. We will delve into the various techniques—from hand fabrication to casting and forging—and follow the creation of sterling silver earrings through every stage, from initial concept to final quality control. Whether you are an aspiring jeweler, a curious consumer, or a design enthusiast, this guide will illuminate the skilled work that goes into creating these wearable works of art.
Phase 1: Conception and Design – The Blueprint for Beauty
The process begins not with metal, but with an idea. This phase is about defining the vision and creating a actionable plan.
Step 1: Inspiration and Ideation
Earring design is influenced by countless factors:
-
Trends and Eras: Art Deco geometry, Victorian elegance, Modernist minimalism, or Bohemian flair.
-
Nature: Organic forms like leaves, flowers, shells, and water droplets.
-
Culture and Symbolism: Motifs with specific meanings, such as mandalas, hamsas, or astrological symbols.
-
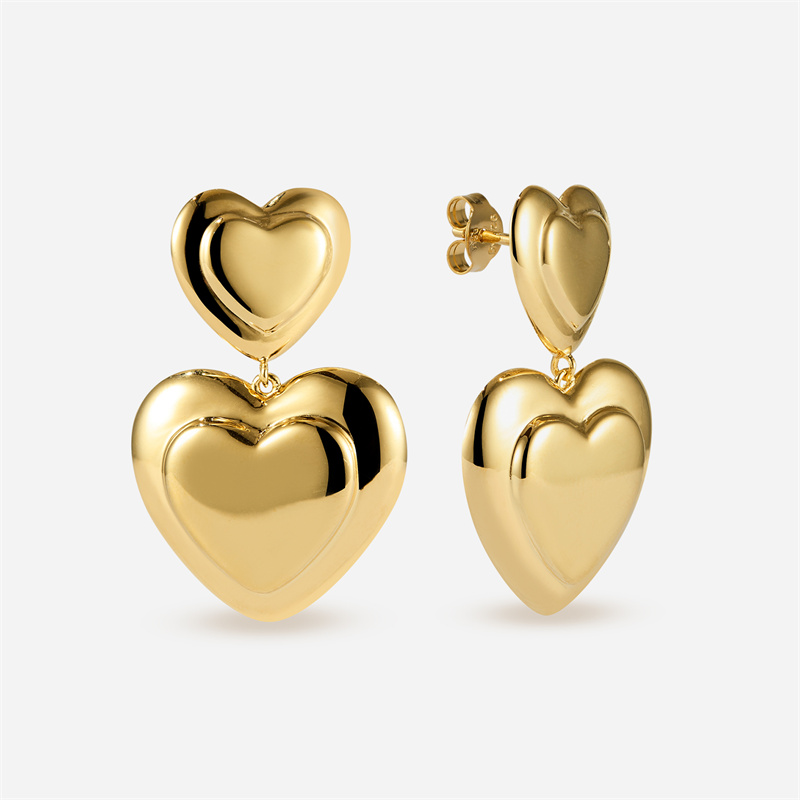
Function and Style: Is the design for studs, hoops, dangles, chandeliers, or threader earrings? Each type has specific functional requirements.
-
The Wearer: Considering lifestyle (everyday wear vs. formal occasion), age, and personal taste.
Designers often create mood boards and gather visual references to solidify their concept before sketching.
Step 2: Technical Sketching and Dimensioning
Freehand sketches are translated into technical drawings. This is crucial for determining:
-
Scale and Proportion: The size and weight of the earrings must be comfortable for the ear. A large, heavy dangle requires a different design approach than a lightweight stud.
-
Front and Side Views: Earrings are three-dimensional. A side-view sketch is essential to understand the depth, how the earring will hang, and how it will sit against the ear.
-
Component Parts: The design is broken down into its components: the front element, the post or hook, any jump rings, and additional dangling parts. This planning is vital for the fabrication phase.
-
Finding Compatibility: The choice of ear wires (French hooks, leverbacks), posts, or clutch backs is made at this stage to ensure the design is functional and secure.
Step 3: Material Selection – Why 925 Sterling Silver?
The choice of material is fundamental. Sterling silver is an alloy consisting of 92.5% pure silver and 7.5% other metals, almost always copper.
-
Why Alloy? Pure silver (999 fine) is too soft for most jewelry applications. It would scratch, dent, and lose its shape easily. The copper additive adds significant strength and durability without drastically altering the beautiful white lustre of the metal.
-
Tarnish: The copper content is also what causes sterling silver to tarnish over time when exposed to sulfur in the air. This is a natural process and is easily reversible with polishing.
-
Forms of Silver: For earring making, silver is used in several forms:
-
Sheet: Available in various thicknesses (gauges). Used for cutting out shapes, stamping, and forming.
-
Wire: Comes in round, square, half-round, and other profiles. Used for making posts, hooks, jump rings, and wire-based designs.
-
Casting Grain: Small pieces of silver for melting in the casting process.
-
Pre-fabricated Findings: Posts, backs, hooks, and jump rings can be purchased ready-made, though many high-end artisans make their own.
-
Phase 2: The Manufacturing Methods – Multiple Paths to Creation
There are three primary methods for creating the components of sterling silver earrings. A single pair may incorporate elements made using all three techniques.
Method A: Sheet Metal Fabrication (Sawing and Piercing)
This is a subtractive process where the design is cut out from a flat sheet of silver.
Step 4: Annealing and Preparing the Silver
The silver sheet is first annealed: heated evenly with a torch until it glows a dull red and then quenched in water. This process softens the metal, making it easier to saw and shape without cracking.
Step 5: Transferring the Design and Sawing
The design is transferred onto the annealed silver using a scribe to scratch the outline. The sheet is then secured on a bench pin. Using a jewelers’ saw with a fine blade, the artisan carefully cuts out the shape. This requires a steady hand and patience, especially for intricate patterns with internal piercework.
Step 6: Filing and Sanding
The sawn edges are rough. Using a series of needle files and progressively finer sandpapers, the artisan refines the shape, smooths the edges, and creates a uniform surface, removing all saw marks.
Method B: Lost-Wax Casting
This is the most common method for producing complex, detailed, or sculptural earrings in volume. It is an additive process.
Step 4b: Creating the Wax Model
A model of the earring is carved by hand from a block of jeweler’s wax or, more commonly today, 3D printed using a high-resolution wax printer from a CAD design. This wax model is a perfect positive of the final earring.
Step 5b: Spruing, Investing, and Burnout
The wax model is attached to a wax “tree” with other models. This tree is placed inside a flask and liquid investment plaster is poured around it. Once hardened, the flask is placed in a kiln for the burnout cycle. The heat melts and vaporizes the wax, leaving a perfect negative cavity in the shape of the earring inside the hardened plaster.
Step 6b: Casting
Sterling silver casting grain is melted in a crucible and, using a centrifugal casting machine, is forced into the hollow plaster mold. The machine spins, using centrifugal force to push the molten metal into every intricate detail of the cavity.
Step 7b: Devesting and Cleaning
After cooling, the plaster mold is broken away in water—a process called devesting. The raw silver earrings, now attached to a metal “tree,” are cut off. They are then cleaned in an ultrasonic cleaner with a pickling solution to remove any residual investment plaster and oxidation.
Method C: Forging and Forming
This method involves shaping silver wire or sheet using force and tools.
Step 4c: Forming Hoops and Wires
To make hoop earrings, a silver wire is first annealed to make it soft and malleable. It is then carefully bent around a mandrel (a tapered steel rod) and tapped with a rawhide or plastic mallet to form a perfect circle. The ends are sawed and filed to meet perfectly.
Step 5c: Texturing and Hammering
Surface texture can be added before or after forming. Silver can be placed on a steel bench block and textured using hammers (ball-peen, cross-peen) or stamped with patterned punches to create unique surfaces.
Phase 3: Assembly and Joining – The Art of Soldering
Few earrings are made from a single piece of metal. Soldering is the process of permanently joining components using a metal alloy that melts at a lower temperature than the silver itself.
Step 7: Preparing the Joint
The areas to be joined must be perfectly clean and fit together tightly. A paste-like substance called flux is applied to the joint. Flux prevents oxidation during heating, which would prevent the solder from flowing.
Step 8: Applying Solder and Heat
Small pieces of silver solder (which comes in easy, medium, and hard grades with different melting points) are placed on or near the joint. Using a precise torch flame, the artisan heats the entire piece evenly. The goal is to bring the work to a temperature where the solder melts and is drawn into the joint by capillary action, but where the sterling silver components themselves do not melt.
Common Soldering Tasks in Earring Making:
-
Attaching a Post: A sterling silver wire is cut and filed to create a post. This is carefully soldered onto the back of a stud earring.
-
Closing a Hoop: The perfect circle of a hoop earring is soldered closed at the seam.
-
Adding Bails and Jump Rings: Loops for dangling elements are soldered onto the main body of the earring.
-
Building Layers: Different layers of a design are stacked and soldered together.
After soldering, the earrings are pickled in a warm acid solution to remove flux and fire-scale (oxidation that occurred during heating).
Phase 4: Finishing – From Rough to Radiant
The post-assembly earrings are rough, discolored, and far from finished. This phase is where they gain their final beauty.
Step 9: Initial Finishing and Surface Refinement
-
Fettling: For cast pieces, this involves removing the sprue nubs (where the earring was attached to the tree) with a saw and files.
-
Stoning: Any solder seams are carefully filed and sanded away until they are invisible. The entire surface is smoothed.
Step 10: Mechanical Finishing
-
Tumbling: Earrings are often placed in a tumbler—a rotating barrel filled with stainless steel shot, water, and burnishing compound. Tumbling for several hours work-hardens the silver, polishes it to a uniform satin shine, and removes tiny surface imperfections.
-
Sandblasting: For a uniform matte finish, earrings can be blasted with fine glass beads in a sandblasting cabinet.
Step 11: Polishing
To achieve a brilliant, mirror-like shine, the earrings are polished on a motorized wheel.
-
Pre-Polish: A stitched muslin wheel charged with a coarse compound like Tripoli is used to remove fine scratches and begin the shine.
-
High-Shine Polish: A separate, clean loose muslin wheel charged with a fine red rouge compound brings out the final brilliant luster. The artisan must hold the earring carefully to polish all contours without it being snatched by the wheel.
Step 12: Oxidization and Antiquing (Optional)
To highlight textures, engraving, or intricate details, a chemical antiquing solution like liver of sulfur is used. It darkens the silver, depositing a black patina in all the recesses. The high points are then gently polished back to bright silver, creating dramatic contrast and depth. This is particularly popular with Celtic, Art Nouveau, and vintage-style designs.
Step 13: Final Assembly
If the earrings have moving parts or non-silver components, they are assembled now:
-
Attaching Ear Wires: Sterling silver French hooks, leverbacks, or threader wires are attached to the main body via soldered jump rings.
-
Adding Non-Metal Elements: Beads, pearls, or gemstones are set or strung onto the assembled components.
Phase 5: Quality Control and Final Preparation
The last steps ensure a perfect product for the wearer.
Step 14: Rigorous Inspection
Each pair of earrings is meticulously examined under magnification for:
-
Structural Integrity: Are all solders secure? Are posts straight and strong?
-
Surface Perfection: Are there any remaining scratches, pits, or polishing marks?
-
Functionality: Do clasps open and close securely? Do hooks have a smooth curve?
-
Matching: For a pair, do both earrings match exactly in size, finish, and detail?
Step 15: Ultrasonic Cleaning and Rhodium Plating (Optional)
-
The finished earrings are placed in an ultrasonic cleaner—a tank filled with a special solvent that uses high-frequency sound waves to remove every trace of polishing compound, dust, and oils.
-
For an extra-bright, white, and tarnish-resistant finish, some sterling silver earrings are rhodium plated. This involves electroplating a thin layer of rhodium (a metal in the platinum family) onto the surface.
Step 16: Packaging
The earrings are dried, placed in a protective zip-lock bag to minimize tarnishing, and presented in a jewelry box. They are now ready to be worn and cherished.

Conclusion
The creation of a pair of sterling silver earrings is a journey of transformation. It is a process that demands a unique synergy of artistic creativity and scientific precision. From the initial spark of an idea to the final buff on the polishing wheel, each stage requires skill, patience, and a deep understanding of the material.
The resulting object is far more than a commodity. It is a testament to human ingenuity and craftsmanship—a small, wearable sculpture that carries with it the energy and intention of its maker. Whether crafted using ancient techniques or modern technology, sterling silver earrings remain a timeless and personal form of adornment, connecting the wearer to a rich history of art and artisanship.