Como criar um colar de pingente de forma de amor em prata esterlina: Uma jornada do conceito para o adorno
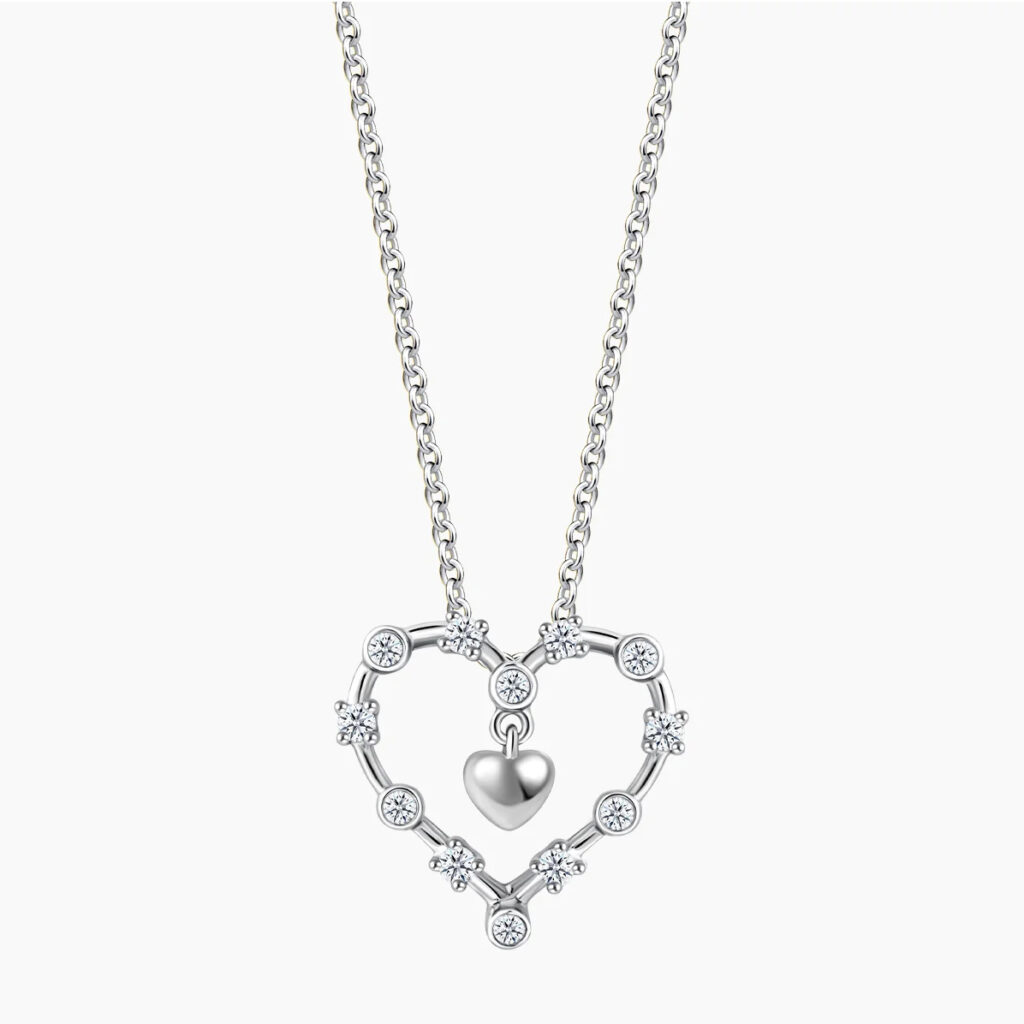
O formato do coração é mais do que apenas um símbolo; É uma linguagem universal. Fala de amor, afeição, amizade, e emoção profunda. Quando criado em um pingente e pendurado em uma corrente de prata esterlina, Torna -se um talismã pessoal, Uma joia imbuída de significado e sentimento. Usar um pingente em forma de amor é levar uma mensagem perto do seu coração. Criar um é um ato de arte, precisão, e expressão pessoal profunda.
A jornada de criação de um colar de pingente de amor de prata esterlina é uma alquimia fascinante de técnicas antigas e tecnologia moderna. É um processo acessível a um hobby com algumas ferramentas manuais e um fabricante profissional operando máquinas industriais. Este guia abrangente o levará a cada passo desta jornada, explorando tanto a escala íntima da bancada do joalheiro artesanal quanto a operação expansiva de uma instalação como Jingying, líder na fabricação de joias de prata personalizadas. Se você é um aspirante a designer, uma marca que busca entender a produção, ou simplesmente um entusiasta curioso, este artigo irá iluminar o caminho de uma ideia simples até um objeto de beleza acabado.

Papel 1: A fundação – Compreendendo a prata esterlina
Antes do primeiro esboço ser desenhado, é preciso entender a tela. A prata esterlina é o material escolhido para este projeto pela sua beleza, trabalhabilidade, e valor.
-
O que é prata esterlina? Prata pura, conhecido como “Prata fina,” é muito macio para a maioria das joias. Ele arranharia facilmente, dobrar, e perder a forma. Para torná-lo durável, está ligado com 7.5% Outros metais, quase sempre cobre. Isso cria um material que é 92.5% prata pura - daí o “925” carimbo, uma marca de autenticidade. O cobre adiciona resistência sem diminuir significativamente o brilho, esquentar, brilho branco da prata.
-
Por que prata esterlina para um pingente?
-
Durabilidade: É forte o suficiente para manter formas detalhadas (como as curvas de um coração) e suportar o desgaste diário.
-
Hipoalergênico: Sua alta pureza o torna adequado para a maioria das pessoas com pele sensível.
-
Trabalhabilidade: É relativamente macio em comparação com outros metais, tornando-o ideal para serrar, arquivamento, de solda, e estampagem.
-
Receptividade para Finalizar: Pode ser polido para um brilho de espelho, dado um acabamento fosco suave, ou oxidado para criar antiguidade, efeitos contrastantes que destacam os detalhes do coração.
-
Valor: Ele oferece a aparência de luxo a um preço muito mais acessível do que platina ou ouro.
-
Papel 2: Os Dois Caminhos da Criação
Existem duas maneiras principais de criar um pingente de forma de amor: fabricação de mãos e elenco. O método escolhido depende do resultado desejado, escala, e recursos.
-
Método a: Fabricação de mãos (A abordagem do artesão) Este é o processo de criação de uma peça única diretamente de Sheet Silver e Wire usando ferramentas manuais. É ideal para peças únicas, protótipos, ou uma experiência criativa profundamente prática.
-
Método b: Elenco (A fabricação & Abordagem em pequenos lotes) Isso envolve a criação de um modelo de coração (frequentemente por impressão 3D) e depois usá -lo para criar um molde. A prata derretida é então derramada neste molde para criar o pingente. Este é o método usado por fabricantes como Jingying produzir consistente, peças de alta qualidade em qualquer quantidade, de uma dúzia a dezenas de milhares.
Vamos explorar os dois caminhos em detalhes.
Caminho a: A arte da fabricação de mãos
É aqui que a magia começa no banco do joalheiro. O processo é meditativo e requer paciência e uma mão estável.
Etapa 1: Design e conceitualização
Tudo começa com uma ideia.
-
O esboço: Comece desenhando seu coração. É um clássico, coração simétrico? Um moderno, Interpretação geométrica? Um orgânico, desigual “Coração do oceano” estilo? Tem um centro de corte? Será uma forma sólida? Esboçar tamanhos e proporções diferentes.
-
Dimensões: Decida sobre o tamanho final. Considere a corrente de que ela vai pendurar - um delicado coração de 1 cm para uma corrente fina ou uma peça de declaração em negrito de 3 cm para uma corrente mais pesada.
Etapa 2: Transferindo o design
-
Materiais: Folha de prata esterlina (18-20 O medidor é uma boa espessura para um pingente), vias de vias, um escriba, e fita adesiva.
-
Processo: Imprima ou desenhe seu design de coração finalizado no papel. Use um pequeno pedaço de fita adesiva para prendê -la diretamente à folha de prata. Usando um escriba ou um awl nítido, rastrear firmemente o contorno do coração, pressionando para baixo para arranhar o design na superfície do metal abaixo.
Etapa 3: Serra a forma
-
Ferramentas: Jewel's Saw Frame e Ultra-Fine Swer Blades (um 2/0 ou 3/0 A lâmina é ideal).
-
Processo: Prenda a folha de prata em um alfinete. Passe a lâmina na moldura com os dentes apontando para baixo e na direção a alça. A tensão deve ser apertada o suficiente para produzir um alto “ping” soa quando arrancado. Lubrifique a lâmina com cera de abelha. Insira cuidadosamente a lâmina através de um buraco piloto perfurado dentro do design (Para recortes internos) ou comece no limite. Siga a linha rabiscada com um constante, movimento para cima e para baixo, Deixando a ferramenta fazer o trabalho. Gire o metal, não a serra, Para navegar por curvas.
Etapa 4: Arquivamento e refino
-
Ferramentas: Um conjunto de arquivos de agulha (plano, meia rodada, redondo, Barrette).
-
Processo: As bordas serradas serão difíceis. Use os arquivos para suavizar todo o perímetro do coração. Use um arquivo plano para bordas retas e um arquivo de meia rodada ou redondo para as curvas na parte superior e inferior do coração. Arquive em uma direção apenas para um acabamento mais suave. Esta etapa é crucial para alcançar uma aparência profissional.
Etapa 5: Lixar e pré-polir
-
Materiais: Lixa ou almofadas abrasivas em grãos progressivamente mais finos (Por exemplo, 220, 400, 600, 800, 1200).
-
Processo: Comece com o grão mais grosseiro para remover todas as marcas de arquivo. Areia em uma direção. Mova para o próximo areia mais refinada, Lixar perpendicular à direção anterior para garantir que você removeu todos os arranhões do estágio anterior. Continue este processo até 1200 Grit para um quase maço, acabamento suave pronto para polimento final.
Etapa 6: Adicionando a fiança
A fiança é o laço pelo qual a corrente passa.
-
Opção 1: Fiança Soldada. Corte um pequeno pedaço de fio de prata esterlina ou use uma fiança pré-fabricada. Dobre-o para dar forma. Usando uma tocha, solda dura, and flux, carefully solder the bail to the top back of the heart pendant. This is the strongest method.
-
Opção 2: Drill and Loop. Drill a small hole through the top of the heart. Create a jump ring from silver wire, thread it through the hole, and solder it closed. This creates a seamless loop.
Etapa 7: Polimento final
-
Ferramentas: Rotary tool (like a Foredom or Dremel) with muslin buffing wheels, compostos de polimento (trípoli para corte, rouge for high shine).
-
Processo: Attach the pendant securely to a mandrel or hold it with tweezers. Apply tripoli compound to one wheel and work the pendant until all fine scratches are removed. Switch to a clean wheel with rouge compound and buff the heart to a brilliant, acabamento espelhado.
Etapa 8: Adding a Patina (Opcional)
To make the details pop, especially if the heart is textured or engraved, an antique finish can be applied.
-
Processo: Use um oxidante químico como fígado de enxofre para escurecer todo o pingente. Então, usando uma almofada de polimento embebida em água com sabão, esfregue suavemente os pontos altos do design, deixando os recessos escuros. Isso cria belo contraste e profundidade.
Etapa 9: Conjunto
Anexe seu pingente em forma de amor recém-criado a uma corrente de prata esterlina de sua escolha. Sua peça única está completa.
Caminho B: A precisão da fundição (O Método JINGYING)
Para produzir vários pingentes idênticos ou designs altamente complexos que são difíceis de serrar manualmente, fundição é o método preferido. Este é o processo industrial aperfeiçoado pelos fabricantes.
Etapa 1: Design Digital e Modelagem CAD
-
Processo: Em vez de um esboço à mão, um designer usa design auxiliado por computador (CAD) software para criar um modelo 3D preciso do pingente de coração. Isso permite uma precisão incrível, simetria perfeita, e a incorporação de detalhes intrincados que seriam impossíveis manualmente.
-
Vantagens: O design pode ser facilmente modificado, dimensionado, e otimizado para fundição. No Jingying, Os designers de CAD trabalham em estreita colaboração com os clientes para transformar seus conceitos em realidade digital fabricável.
Etapa 2: 3D impressão (Prototipagem rápida)
-
Processo: O arquivo CAD digital é enviado para uma impressora 3D de alta resolução. A impressora constrói o modelo camada por camada a partir de uma cera de fundição especial ou de uma resina que queima de forma limpa. Isso cria um protótipo físico perfeito do pingente de coração.
-
Vantagem: O cliente pode segurar, examinar, e aprove isso “3Impressão D” antes de qualquer metal caro ser usado. Jingying depende desta etapa para garantir a satisfação do cliente e evitar erros dispendiosos posteriormente.
Etapa 3: Fabricação de mofo
-
Processo: O modelo de cera aprovado é sprued (preso a uma cera “árvore” com outros modelos para produção em massa). Esta árvore é então colocada dentro de um frasco de aço, e um gesso líquido é derramado ao redor dele. O gesso se fixa em um molde duro.
Etapa 4: Esgotamento e elenco
-
Burnout: O frasco é colocado em um forno, e o modelo de cera/resina dentro está derretido (“perdido”), deixando uma cavidade oca perfeita no formato do pingente de coração. Isto é conhecido como “fundição de cera perdida” método.
-
Elenco: O frasco é retirado do forno ainda quente e colocado em uma máquina de fundição a vácuo.. O grão de prata esterlina é derretido em um cadinho e depois arremessado por força centrífuga ou puxado por vácuo para dentro da cavidade oca, preenchendo cada detalhe minucioso.
Etapa 5: Desembaçamento e Limpeza
-
Processo: Depois que a prata esfriar e solidificar, o molde de gesso é temperado em água, fazendo com que ele se separe da árvore prateada. Os pingentes de prata brutos, agora ligado à prata “jito,” estão cortados.
Etapa 6: Acabamento, Polimento, e Controle de Qualidade
É aqui que as peças fundidas se transformam em joias.
-
Caindo: Os pendentes são colocados em uma máquina giratória com granalha de aço e água com sabão para alisar as superfícies e endurecer o metal..
-
Acabamento da mão: Quaisquer portões de lançamento restantes são arquivados. Polidores qualificados então lustram cada pingente até o acabamento especificado (alto brilho, Matte, etc.).
-
Controle de qualidade rigoroso: No Jingying, cada pingente passa por uma inspeção multiponto em busca de defeitos, qualidade de acabamento, e precisão dimensional. Isso garante que apenas peças perfeitas avancem.
Etapa 7: Montagem e Embalagem
Os pingentes em formato de amor acabados são combinados com correntes de prata esterlina de alta qualidade, colocado em embalagens de marca personalizada, e preparado para envio global.
Conclusão: O coração forjado em prata
Criar um colar com pingente em formato de amor em prata esterlina é um processo profundamente gratificante, seja perseguido como um ofício pessoal ou um empreendimento profissional. Ele nos conecta a uma tradição de adorno que se estende por milênios, permitindo-nos criar símbolos tangíveis de nossos sentimentos mais intangíveis.
O método de fabricação manual oferece a satisfação emocionante de criar algo único a partir de matérias-primas, uma tradução direta do pensamento em forma. O método de fundição, como dominado por fabricantes como Jingying, democratiza essa beleza, tornando possível compartilhar um único design bonito com o mundo, garantindo que cada peça seja tão perfeita e duradoura quanto o sentimento que representa.
No fim, seja criado por um único par de mãos em um banco tranquilo ou pela dança sincronizada de uma fábrica moderna, um pingente de amor em prata esterlina é mais do que um acessório. É uma história, uma promessa, e um pedaço de coração, dada forma em um dos metais mais bonitos do planeta.